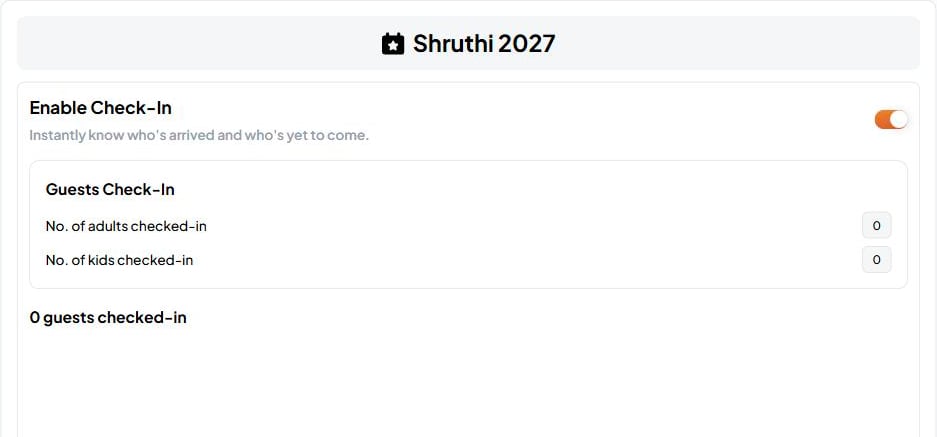
Self Check-In is an optional feature for Regular Events. There’s no gate or ticket to scan at a private gathering — so when you turn Self Check-In on, its job is simple: it lets guests mark themselves as arrived, giving you a live picture of who actually made it.
Self Check-In screenshot
Self Check-In is off by default and entirely optional. Turn it on only if you’d like to know which guests have arrived. If you don’t need an attendance view, you can leave it off — your event runs perfectly well without it.

How it works

When the feature is enabled, a guest simply opens Fast Party when they arrive and checks themselves in. There’s no QR code to scan and nothing for you to do at the door — guests check themselves in, and you see the count update.
1

Enable Self Check-In

In your event, turn on Self Check-In. This makes the option available to your guests.
2

Guests check themselves in on arrival

When a guest arrives, they open Fast Party and tap to check in. No scanning, no host action required.
3

You see who's arrived

Your arrival view updates as guests check in, so at any point you can see who’s already there and who hasn’t arrived yet.

When to use it

Self Check-In is most useful when knowing your real-time headcount matters — for example:
  • A larger gathering where you can’t eyeball who’s in the room.
  • An event with timed moments (a toast, a surprise, dinner service) where you want to know everyone’s arrived before you begin.
  • Any time you’d simply like a record of who showed up.
For a small, informal get-together, you may not need it at all — which is exactly why it’s optional.
This is different from check-in for Registered Events. At a Registered Event, attendees receive a QR code and the host checks them in at the door — see Attendee Check-In. Self Check-In, by contrast, is guest-driven and optional, built for private gatherings rather than ticketed entry.