

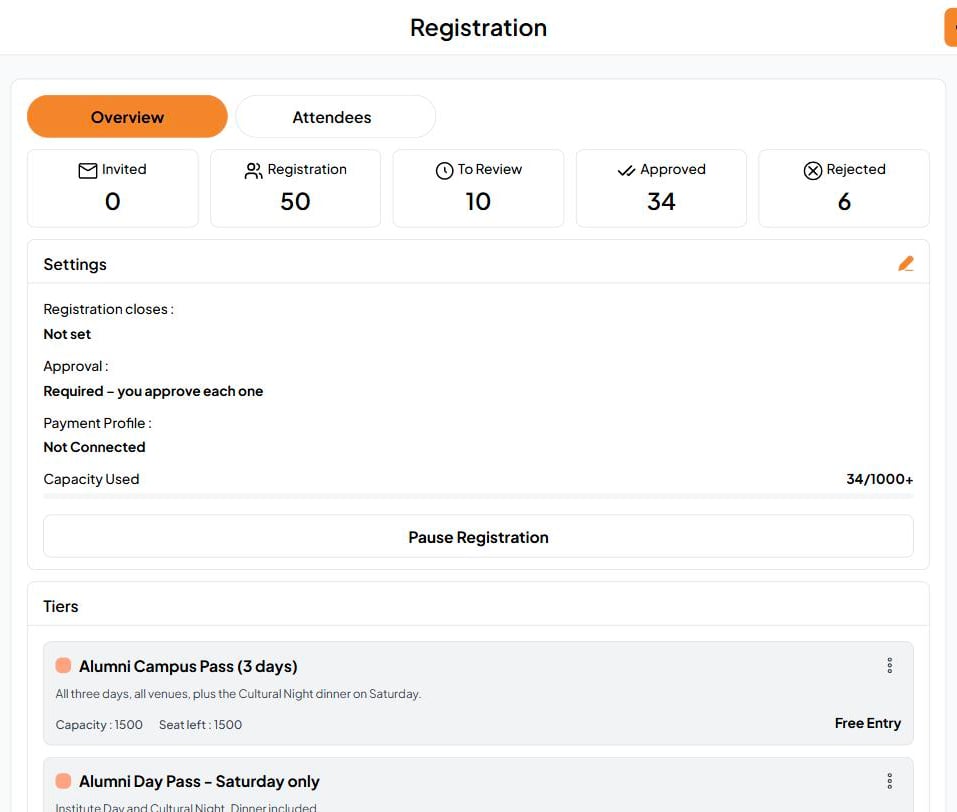
Overview at a glance
The top row counts every registration:
Below it, Settings shows when registration closes, whether approval is required, your payment profile, and how much of your capacity is used. Pause Registration stops new sign-ups until you resume.
Set up registration
Click the pencil on Settings to open Set Up. Finish this before you share the event: it can’t be shared until registration setup is done.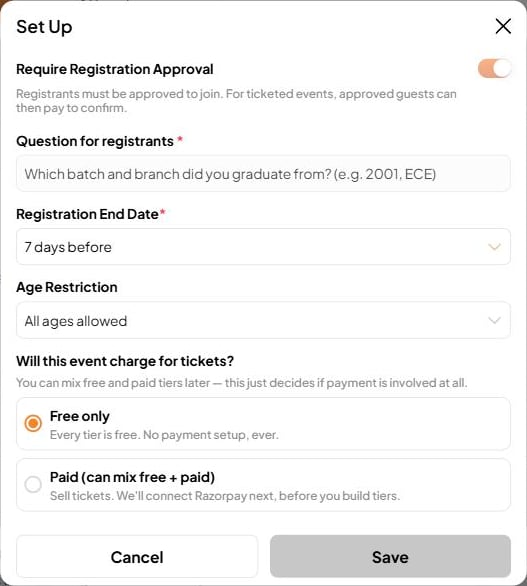
Ticket revenue goes straight to your own account. Fast Party never holds the money. Organizations set up payments once in organization setup.
Tiers
Tiers are your ticket types, such as a 3-day pass, a single-day pass and a family pass. Click Add New Tier:
Each tier shows its capacity and seats left.
Bring people in
- Share Invite: share the registration link on WhatsApp, email, your website or social media.
- Add Attendees: add people yourself.
Review attendees
Open the Attendees tab. Filter by Invited, Registration, To Review, Approved or Rejected, and see where they came from: the link, or your own invitation.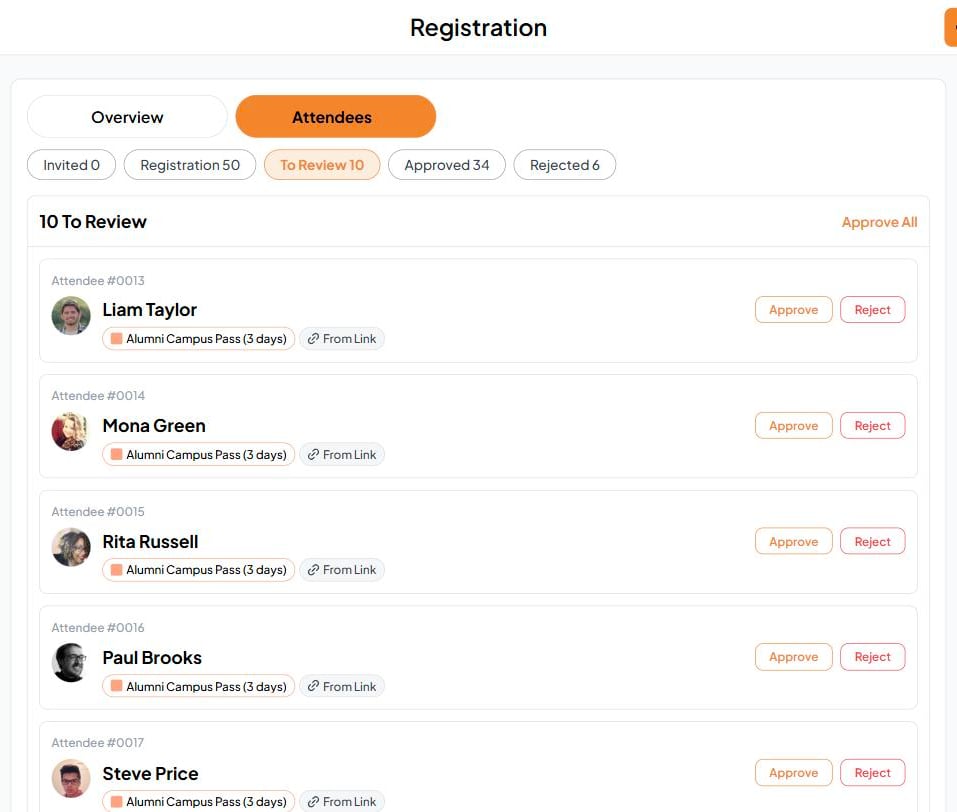
- Approve or Reject each person. They’re notified either way, and approved attendees get their ticket.
- Approve All confirms everyone waiting at once.
- Each attendee shows their number, tier and status.